1.-TOP COVER DISASSEMBLING
1.1.- WINDING LEVER
|
STEP 1:
Remove the cover of the winding lever.
Use a rubber tool or a gauge as recommended by Tomosy in his book
(danger! The cover can be marked)..
|
|
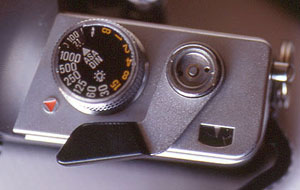
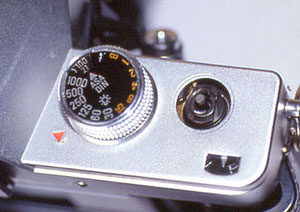
1.2.- SPEED AND ASA DIAL
|
STEP 1:
Set speed 1/500 and 100 ASA (not
shown in the picture). The cover of the dial is glued. Remove
it with an screwdriver.
|
|

1.3.- REWIND LEVER
|
STEP 1:
Remove the rewind lever as usual.
|
|
1.4.- HOT SHOE
|
STEP 1:
Remove 3 screws from the hot shoe.
STEP 2: You will find a plastic “U”shape washer. Desolder the blue wire. |
1.5.- SCREWS FROM THE TOP COVER
|

|
1.6.- TOP COVER REMOVED
|
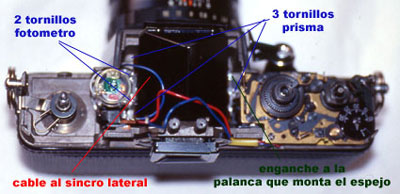
The lightmeter is fixed by 2 screws. Furthermore is glued but it is easily removed. The prism and focus screen are also glued (Don`t try to disassemble). This block is fixed by 3 screws (see picture). If you remove it, be careful! There is a small lever coupled to the mirror mechanism. It is the lever you see through the viewer indicating if the shutter is cocked or not. |
2.-BOTTOM COVER DISASSEMBLING
|
Remove 4 screws.
|
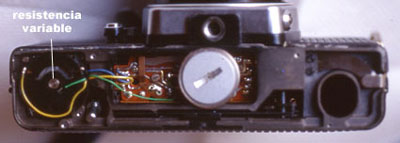
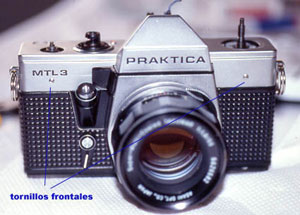
3.- FRONT DISASSEMBLING
 Peel
off the front of the camera and remove 4 screws. You will be able to remove
the mirror cage in one block. Be careful. Several wires come from the
lightmeter board (sited in the bottom) and may become unsoldered.
Peel
off the front of the camera and remove 4 screws. You will be able to remove
the mirror cage in one block. Be careful. Several wires come from the
lightmeter board (sited in the bottom) and may become unsoldered.
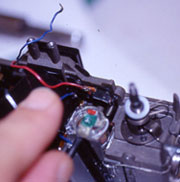
Be careful too with the wire coming from the synchro of the lateral part to a small plate sited venid the prism and lightmeter (see picture). It is better to unsolder it.
Author: Rafael Alday